Your #1 Online Shipping Software To Print USPS Shipping Labels
Your #1 Online Shipping Software To Print USPS Shipping Labels
Your #1 Online Shipping Software To Print USPS Shipping Labels
View Categories
How to Print USPS Scan Form (5630)
< 1 min read
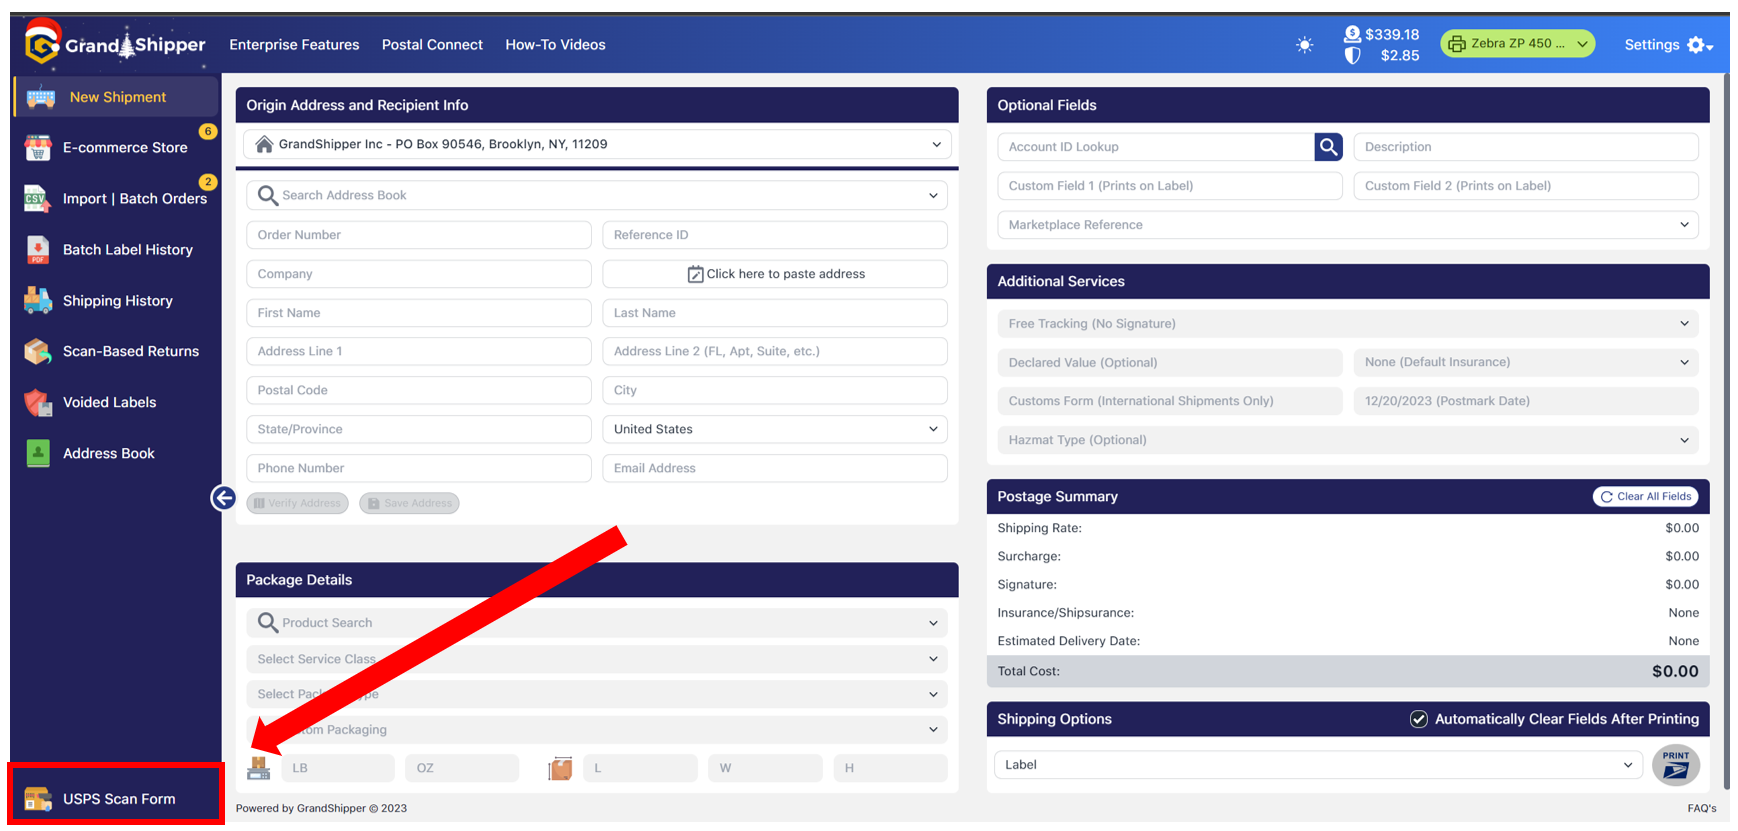
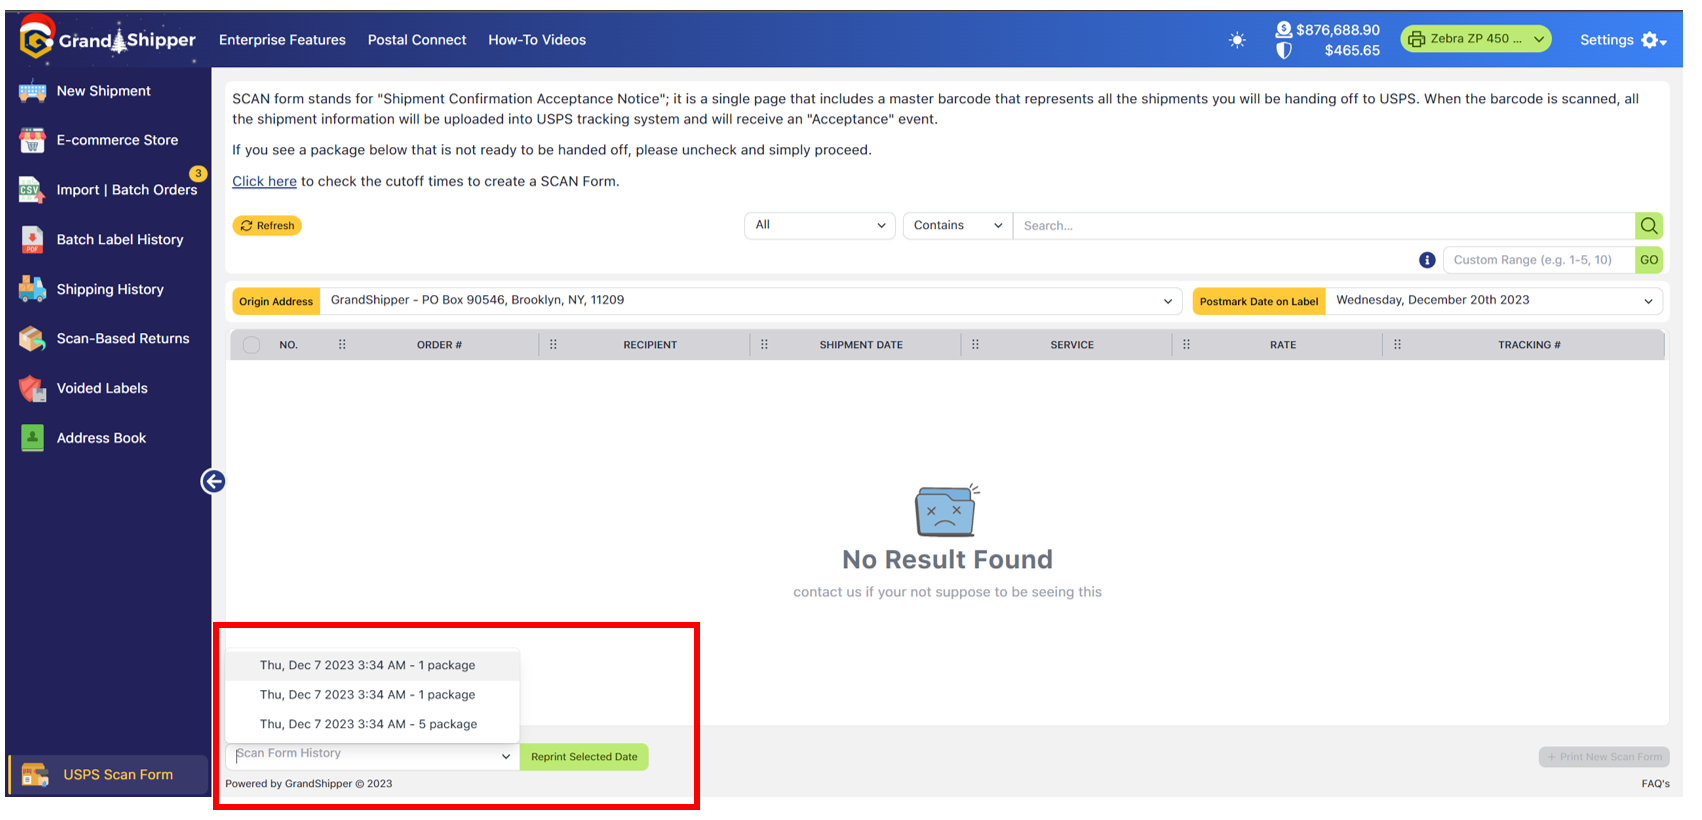
1. Located in the bottom left hand menu is the “USPS Scan Form” button
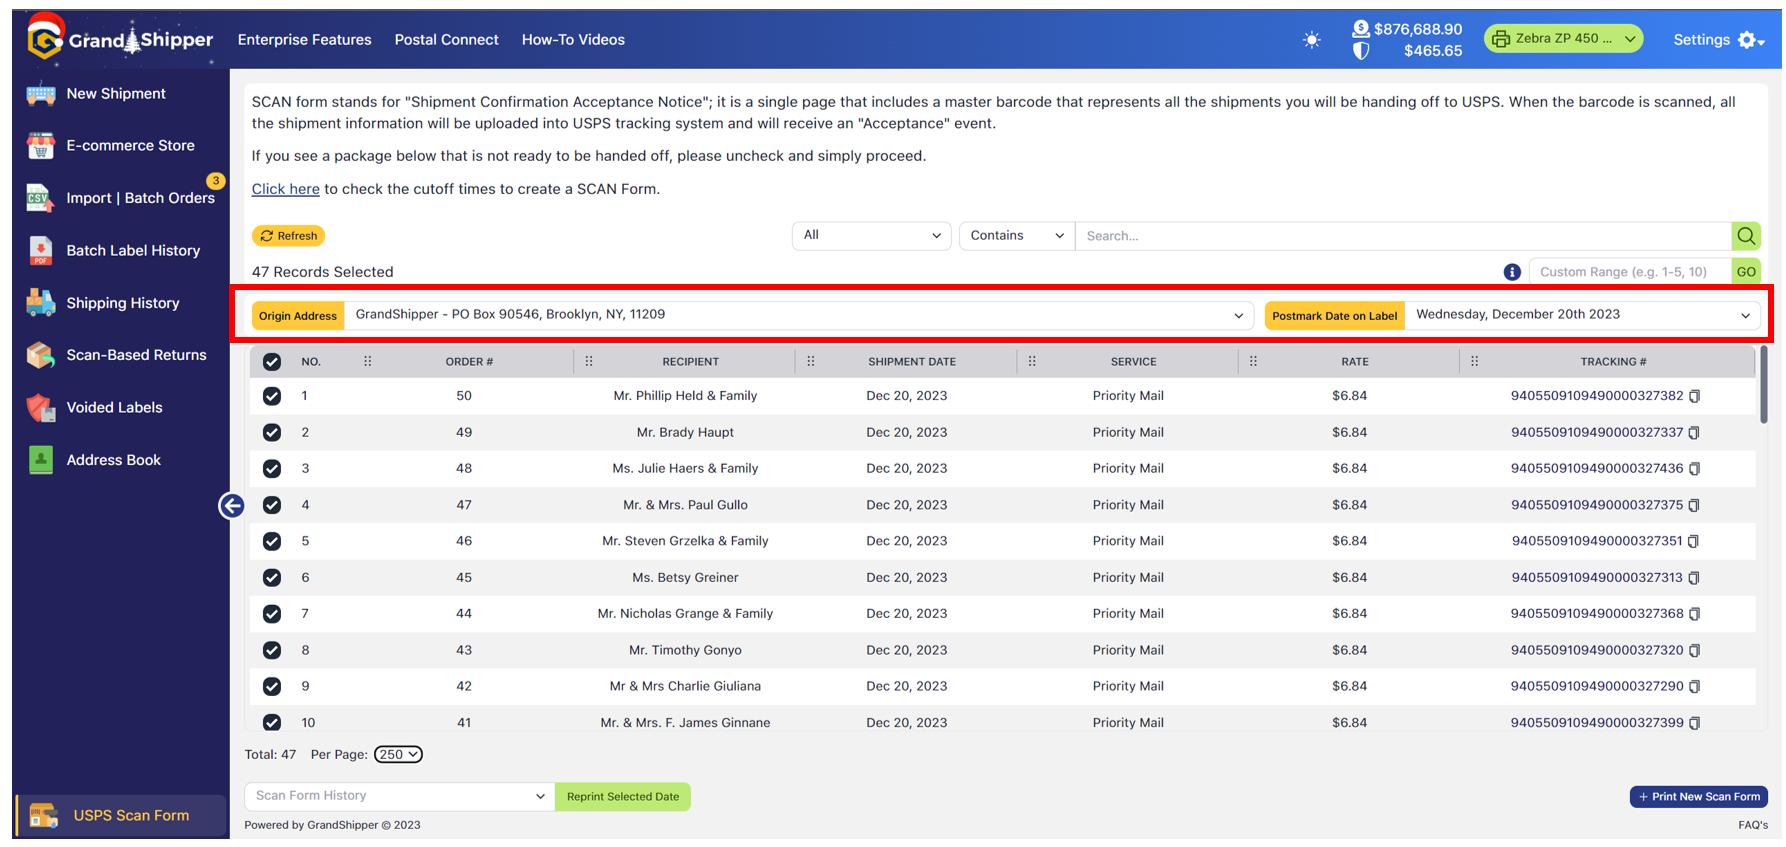
2. Choose the Origin Address and Postmark Date on Label (default will show current day) – All your shipments should appear. If there is a shipment that you have created the label but do not wish to add to the Scan Form, simply uncheck it.
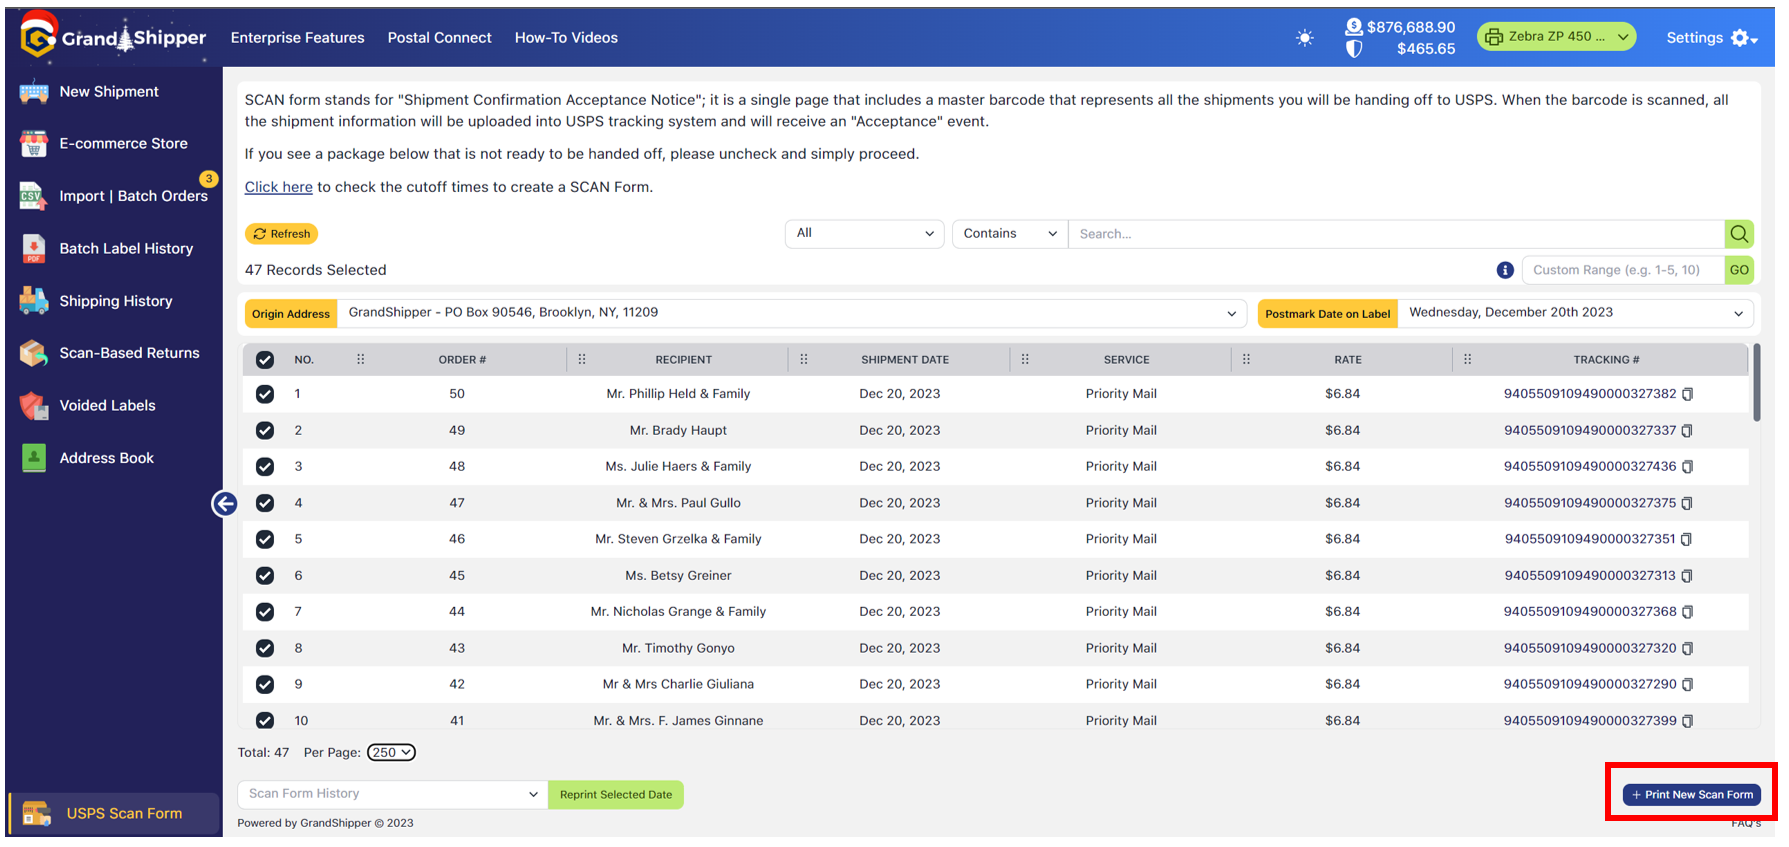
3. Located in the bottom right corner is the button “Print New Scan Form”
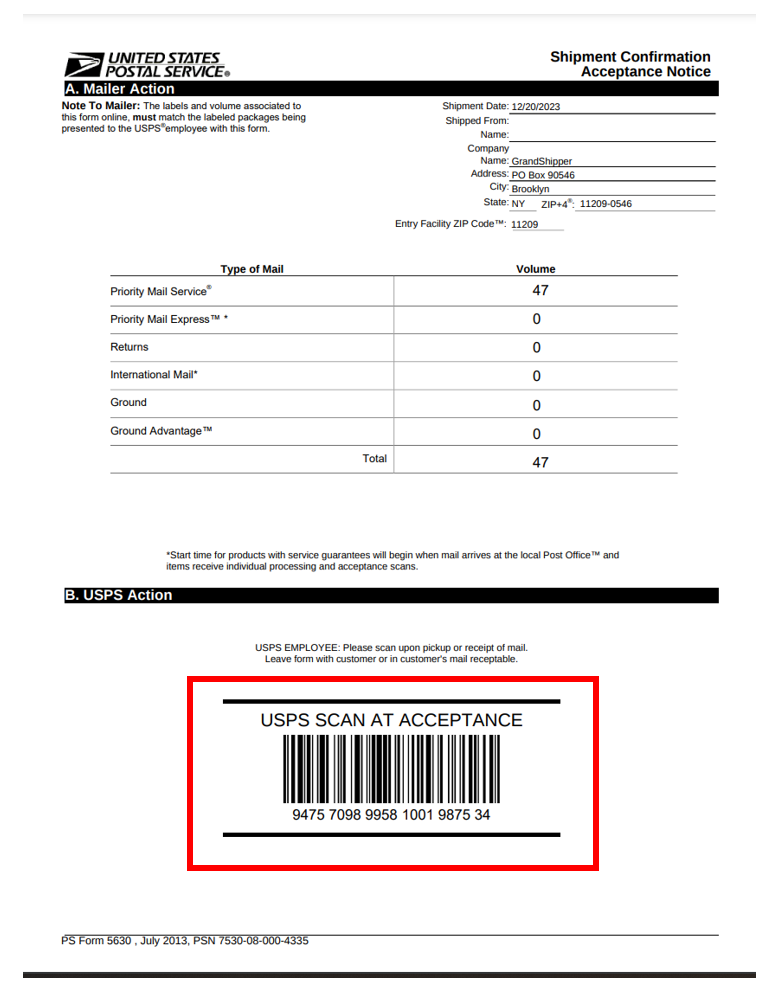
4. After clicking the “Print New Scan Form” – the form should appear (if it does not, please make sure your browser pop-up blocker is not preventing it). Present this to the USPS (pickup or drop representative) which they will scan starting the clock in transit.
5. To reprint the “USPS Scan Form”, view the bottom left and choose appropriate date. We only keep the last 10 Scan Form History.